)
How to integrate the Vaisala WXT510/520/530 and the Septentrio PolaRx5 (Web User Interface)
Configuring the Vaisala WXT510/520/530 Weather Transmitter
There are two ways to configure the Vaisala WXT510/520 Weather Transmitter:
-
Use the Vaisala configuration software and service cable; load the UNAVCO configuration file located at:
/questions/306/Vaisala+WTX-510%7B47%7D520+config+file+ .
OR
-
Use hyper terminal (or any other terminal emulation program) to configure the Vaisala WXT510/520 manually.
To configure the Vaisala using a terminal emulation program:
-
Connect to the Vaisala using the following settings:
-
Baud: 19200
-
Parity: None
-
Flow Control: None
-
Edit the hyper terminal ASCII settings:
-
check box for "send line ends for line feed"
-
check box for "Echo typed characters locally"
-
check box for "Append line feed to incoming line ends"
-
-
-
With the terminal connection established, power up the Vaisala. You should get a "0X0, start" message.
-
Use the following commands to configure the WXT510/520:
-
0XU,M=Q,C=2 (This should set the WXT510 to NMEA polled, RS232 communication)
-
0TU,R=&11010000,I=180,P=B,T=C (This should set the pressure units to bar and temperature to Celsius)
-
0RU,R=&10000000U=M,Z=A (This sets the precipitation units to mm/hr and counter reset)
-
0WU,R=&01001000 (These next two commands sets wind averaging, units, and output values)
-
0WU, I=180,A=180,U=M,F=1
-
0SU,R=&00000000 (This removes the system status elements from the output values)
-
0XU,M=P (to change the communication protocol back to ASCII)
-
-
Verify the Vaisala is enabled:
-
Issue a "0R0" command.
-
The met pack is set to output the following string:
0R0,Dm=076D,Sm=0.1M,Ta=24.4C,Ua=20.9P,Pa=0.8429B,Rc=0.00M,Hc=0.0M
where:
0R0 - the command that is sent
Dm - wind direction, degrees
Sm - wind speed, m/s
Ta - temperature, degree C
Ua - humidity, percent
Pa - barometric pressure, Bar
Rc - rainfall, mm/sampling period (reset at each measurement)
Hc - hail, hits/sampling period (reset at each measurement)
-
Configuring the Septentrio PolaRx5
Note: If using a WXT530, you must update the receiver firmware to 5.4.0
Configuring the PolaRx5 using a telnet connection
- Connect to the receivers Web User Interface with a browser (Firefox works best)
- Login to the receiver with your username and password
-
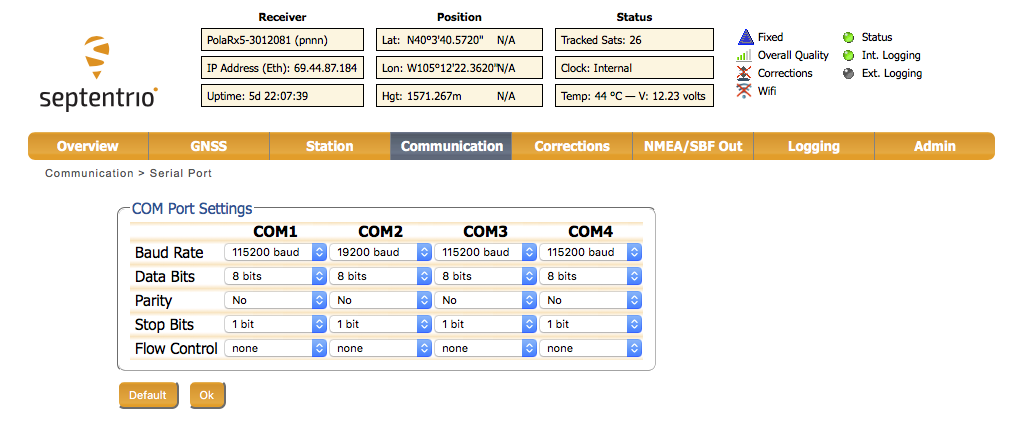
Navigate to Communication -> Serial Port. Here we choose to configure the serial port COM2 to communicate with the met device.
-
Select a baud rate of 19200, 8 bits, no parity, 1 stop bit, and no flow control. Make sure to click OK when finished with your selection.
-
Navigate to Corrections -> Input.
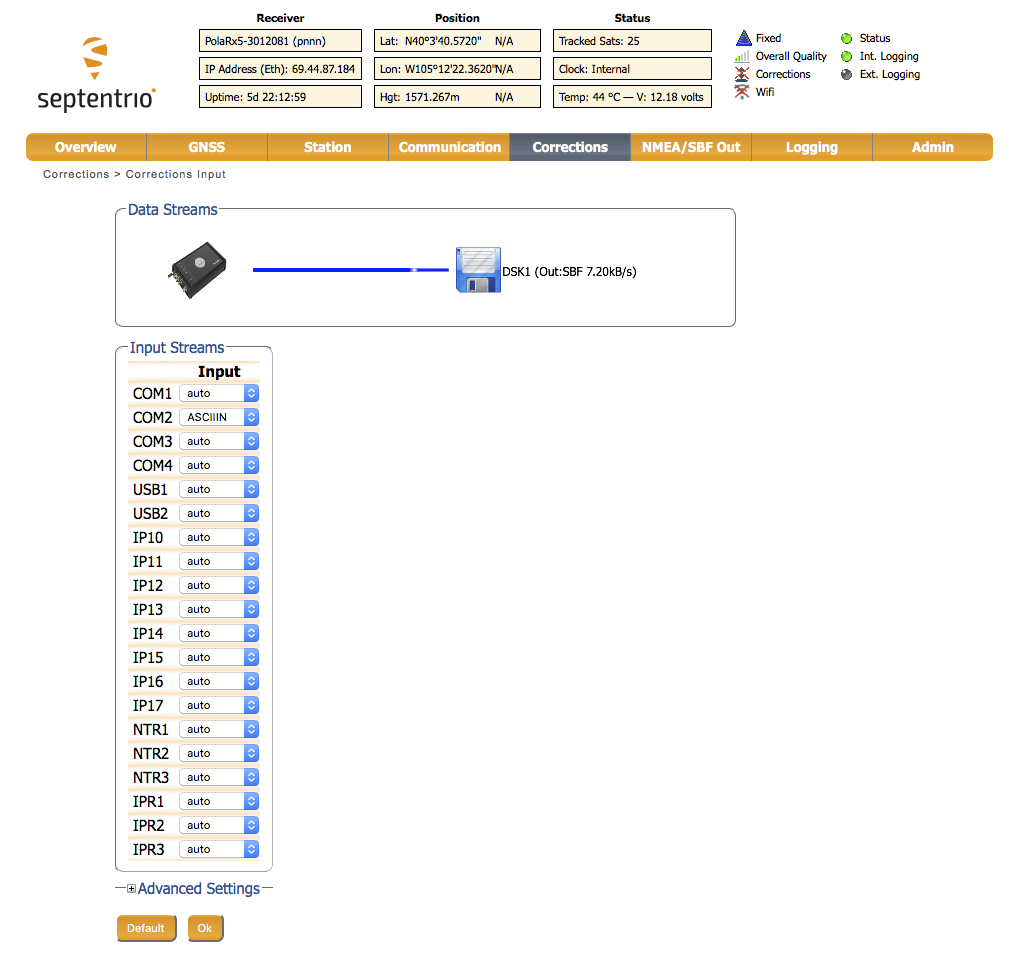
- In the dropdown menu select ASCIIIN. This allows the COM2 serial port to accept ASCII strings as input. Make sure to click OK when finished with your selection.
-
Navigate to Station -> External Sensor.
-
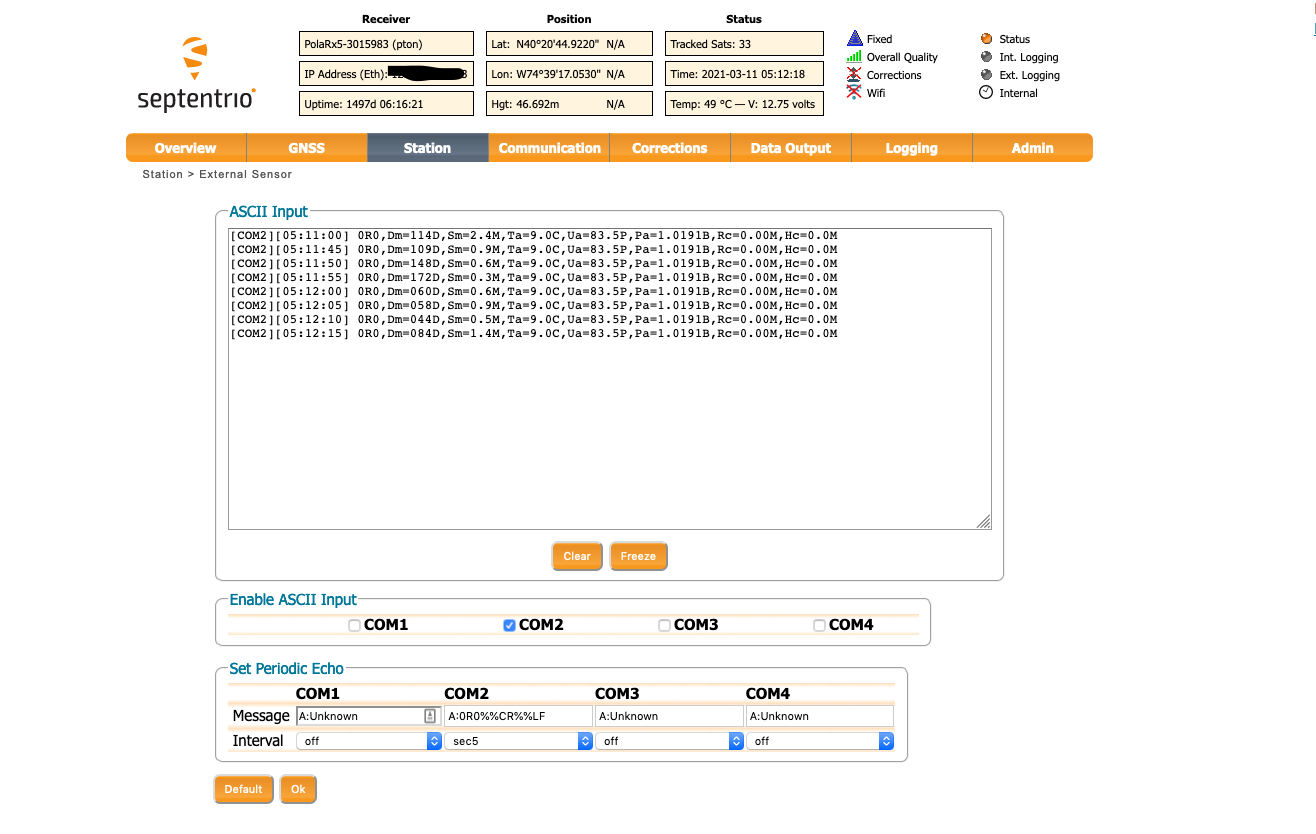
- Enable ASCII Input for the serial port where the met device will be connected (COM2 in the example).
- Add the ASCII message that will be sent to the receiver (A:0R0%%CR%%LF).
- The ’A:’ tells the receiver that you will be sending an ASCII string from COM2
- The ’0R0’ is the command that will tell the met device to make a measurement.
- The ’%%CR%%LF’ correctly terminate the ’0R0’ command.
- Select the desired interval for your measurement (usually something like 5min).
- Make sure to click OK when finished to save your selection.
- If the me device is connected and functioning, you should start seeing the response in the ASCII Input window.
- If you selected a 5min interval you may have to wait a little while to see the first response.
-
-
Navigate to Logging -> Log Sessions.
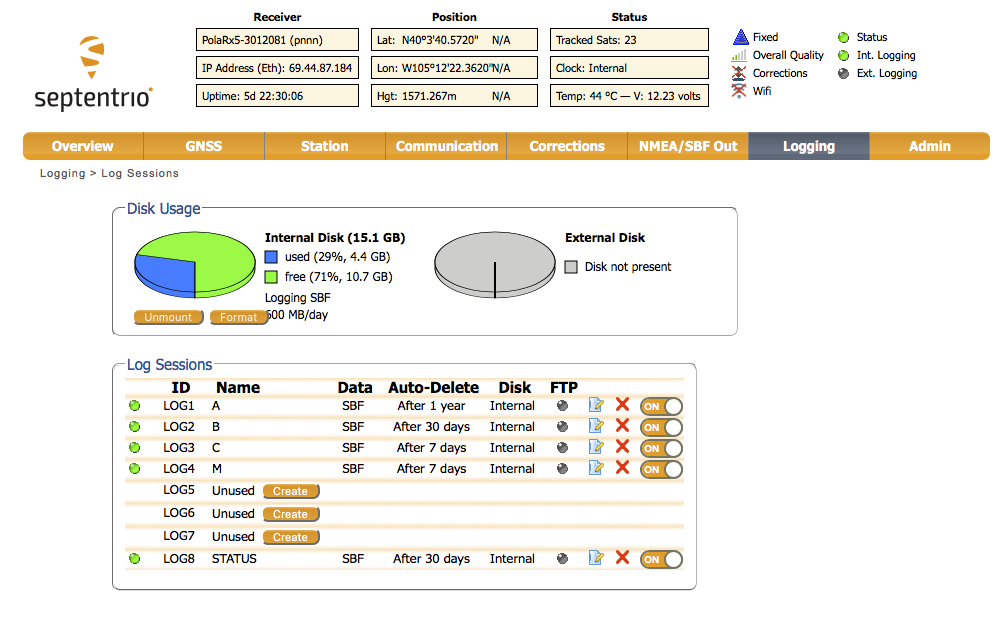
- Click the edit button for the logging session that you would like to add met logging to.
- Click SBF Logging
- Click to edit the stream for that session.
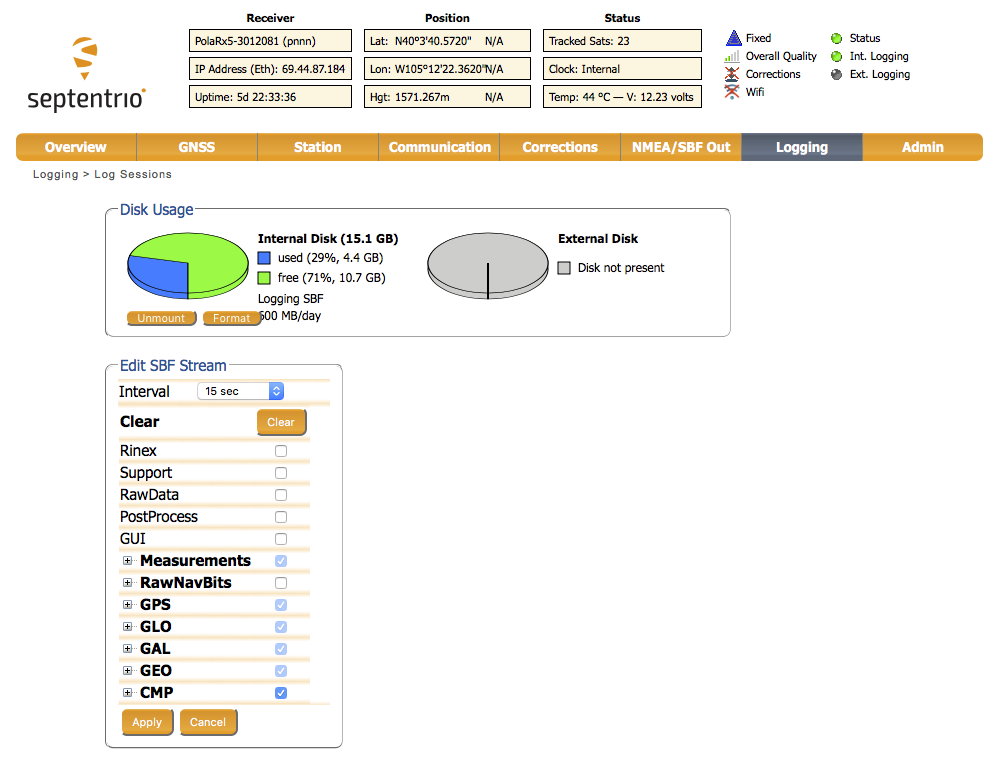
- Scroll down and select ASCIIIN.
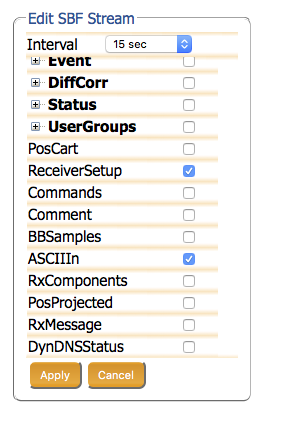
- Select Apply
- Important Note: ASCIIIN is a special record that ignores the logging interval. ASCIIIN messages will log to the file when the receiver receives a response from the met device.
- Now save your new settings to Boot! (if you forget, your receiver will revert to it’s previous state the next time it reboots)


Using teqc to extract met records
Use the following command to create a met file:
teqc +met <filename>.met -M.obs pr+td+hr+ws+wd+ri+hi <filename>.sbf > <filename>.obs
where <filename>.sbf is the binary file that you pulled from the receiver,
and
<filename>.met is the ASCII file that contains the extracted met data,
and
<filename>.obs is the RINEX observation file extracted from the SBF file.