Trimble NetR5, NetR8, NetR9 - Using IP filtering
Purpose
This guide explains how to enable IP filtering on Trimble NetR5, NetR8 and NetR9 receivers. IP filtering is recommended for increasing network security on receivers that are used outside secure network firewalls. By filtering IP traffic to the receiver, many common network attacks (NTP, FTP, DNS) can be prevented by limiting connections to trusted IP addresses.
How to enable IP filtering
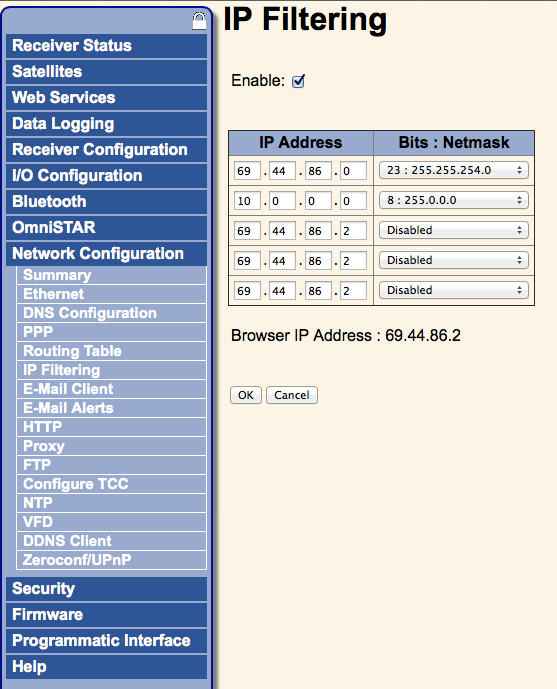
The IP filtering control panel is located in Network Configuration -> IP Filtering.

Enter all of the IP addresses that will need access to the receiver. Specify the required Netmask for each address. Then select ’OK’ to save the changes.
Note: If you do not add your current address to the IP address list, you will no longer be able to access the receiver from that address after selecting ’OK’.
For your convience the IP Filtering control panel displays your current IP address at the bottom of the pane. You can also determine the address of any computer by opening a browser and navigating to ipchicken.com.
Implications
If the server address for each of the following serivces is not included in the allowed IP space, then IP filtering may prevent those services from functioning corrrectly. We recommend testing each of the following services after enabling IP filtering to verify that they still function correctly.
- DNS
- FTP Push
- DDNS Client
- I/O Configuration (input streams; e.g. RTCM)
- Email Client/Alerts
)