How to configure an Aironet Wireless Bridge
How to Configure an Aironet Wireless Bridge
The following procedure is intended to establish a link
between two Cisco Bridges.
There are many ways to accomplish this task; this is one of
the simplest.
Equipment required:
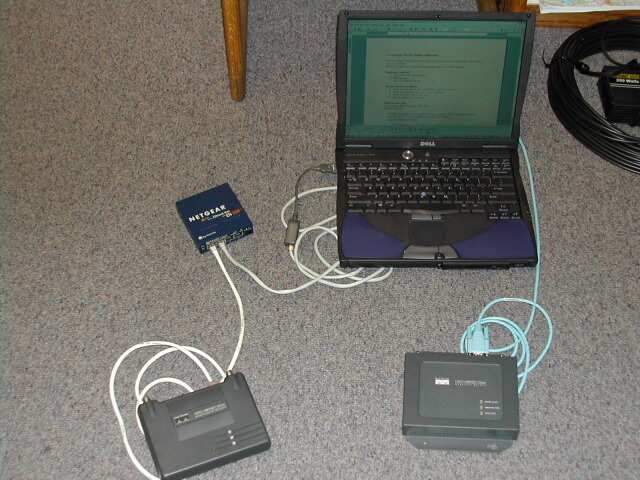
Computer with Ethernet card
Ethernet hub
Two or 3 Ethernet cables
Serial cable

The procedure is as follows:
Set up the base unit so that it can establish a network presence.
Establish a link from the remote unit to the base.
Apply security to the remote unit.
Apply security to the base unit.
Set up the base unit
Cisco Aironet Wireless Bridge (Base Unit)AIR-BR350-A-K9
The Wireless Bridge requires an IP in order to function. (There are various methods to assign and IP to the unit outlined in the Cisco document "BR_QuickStartGuide.pdf").
Connect the supplied serial cable from the back of the unit to your PC.
Run ProComm or HyperTerminal and connect to the bridge at 9600-8-n-1.
Press “b” to bring up the bottom of the menu.
Press “se” to bring up the setup screen (note – the menu system works by navigating based on screen names. When you have reached a point in typing a screen name which can be uniquely identified, that screen comes up).
Type “ex” to bring up the express screen setup.
Type “ad” for IP address, enter the desired address. (This can be a valid or dummy IP. If the IP is a dummy address then the unit cannot be accessed remotely.)
Type “su” for subnet mask, enter the subnet mask value.
Type “gw” for gateway, enter the gateway.
Type ”ra” to setup the SSID – this will be used to match the base with the remote unit. For an example, use the word “UNAVCO.”
The unit is now configured for basic operation.
Establish a link from the remote unit to the base
Cisco Aironet Workgroup Bridge (Remote Unit)
AIR-WGB352R
The WGB comes configured with an IP of 192.168.200.1. The unit can be accessed through a web interface or telnet. (It does not have a serial port).
Configure your PC to have a static IP of 192.168.200.5.
Attach your PC and the WGB the Ethernet hub.
Open a web browser and point it to 192.168.200.1.
Go to the configuration menu and then to Radio, set the field “Service set identification” to “UNAVCO” as you did in step 9 above. (The radio lights on the two bridges should start to communicate at this point.) Now it’s time to add security.
Apply security to the remote unit
Go to Privacy configuration under the radio menu – select set key.
Make a key for WEP communication.
Assign the key to be used by the WGB.
Apply security to the base unit
Reconfigure your PC to have a valid IP address.
You can now attach the bridge to the network and log in
through the web interface.
Open a browser and type in the IP address assigned to the
unit.
Open a browser to the IP address of the Wireless Bridge (Base Unit).
Go to setup, select security, User information and create a new user. This will limit access to the unit from the web.
Go to setup, select security, select Radio Data Encryption (WEP).
Set a transmission key which matches the one set in step 6 above.
Set “Use of Data Encryption by Stations is:” to full encryption.
The radio lights on the two units should start to flash as they communicate.
The configuration is finished
A computer attached to the remote bridge requires a cross over cable in order to access the Internet.
)