Coordinate Transformations with Geographic Calculator
This document outlines how to use Blue Marble Geographic Calculator to convert:
- Single coordinates
- Single data file
- Batch of multiple files
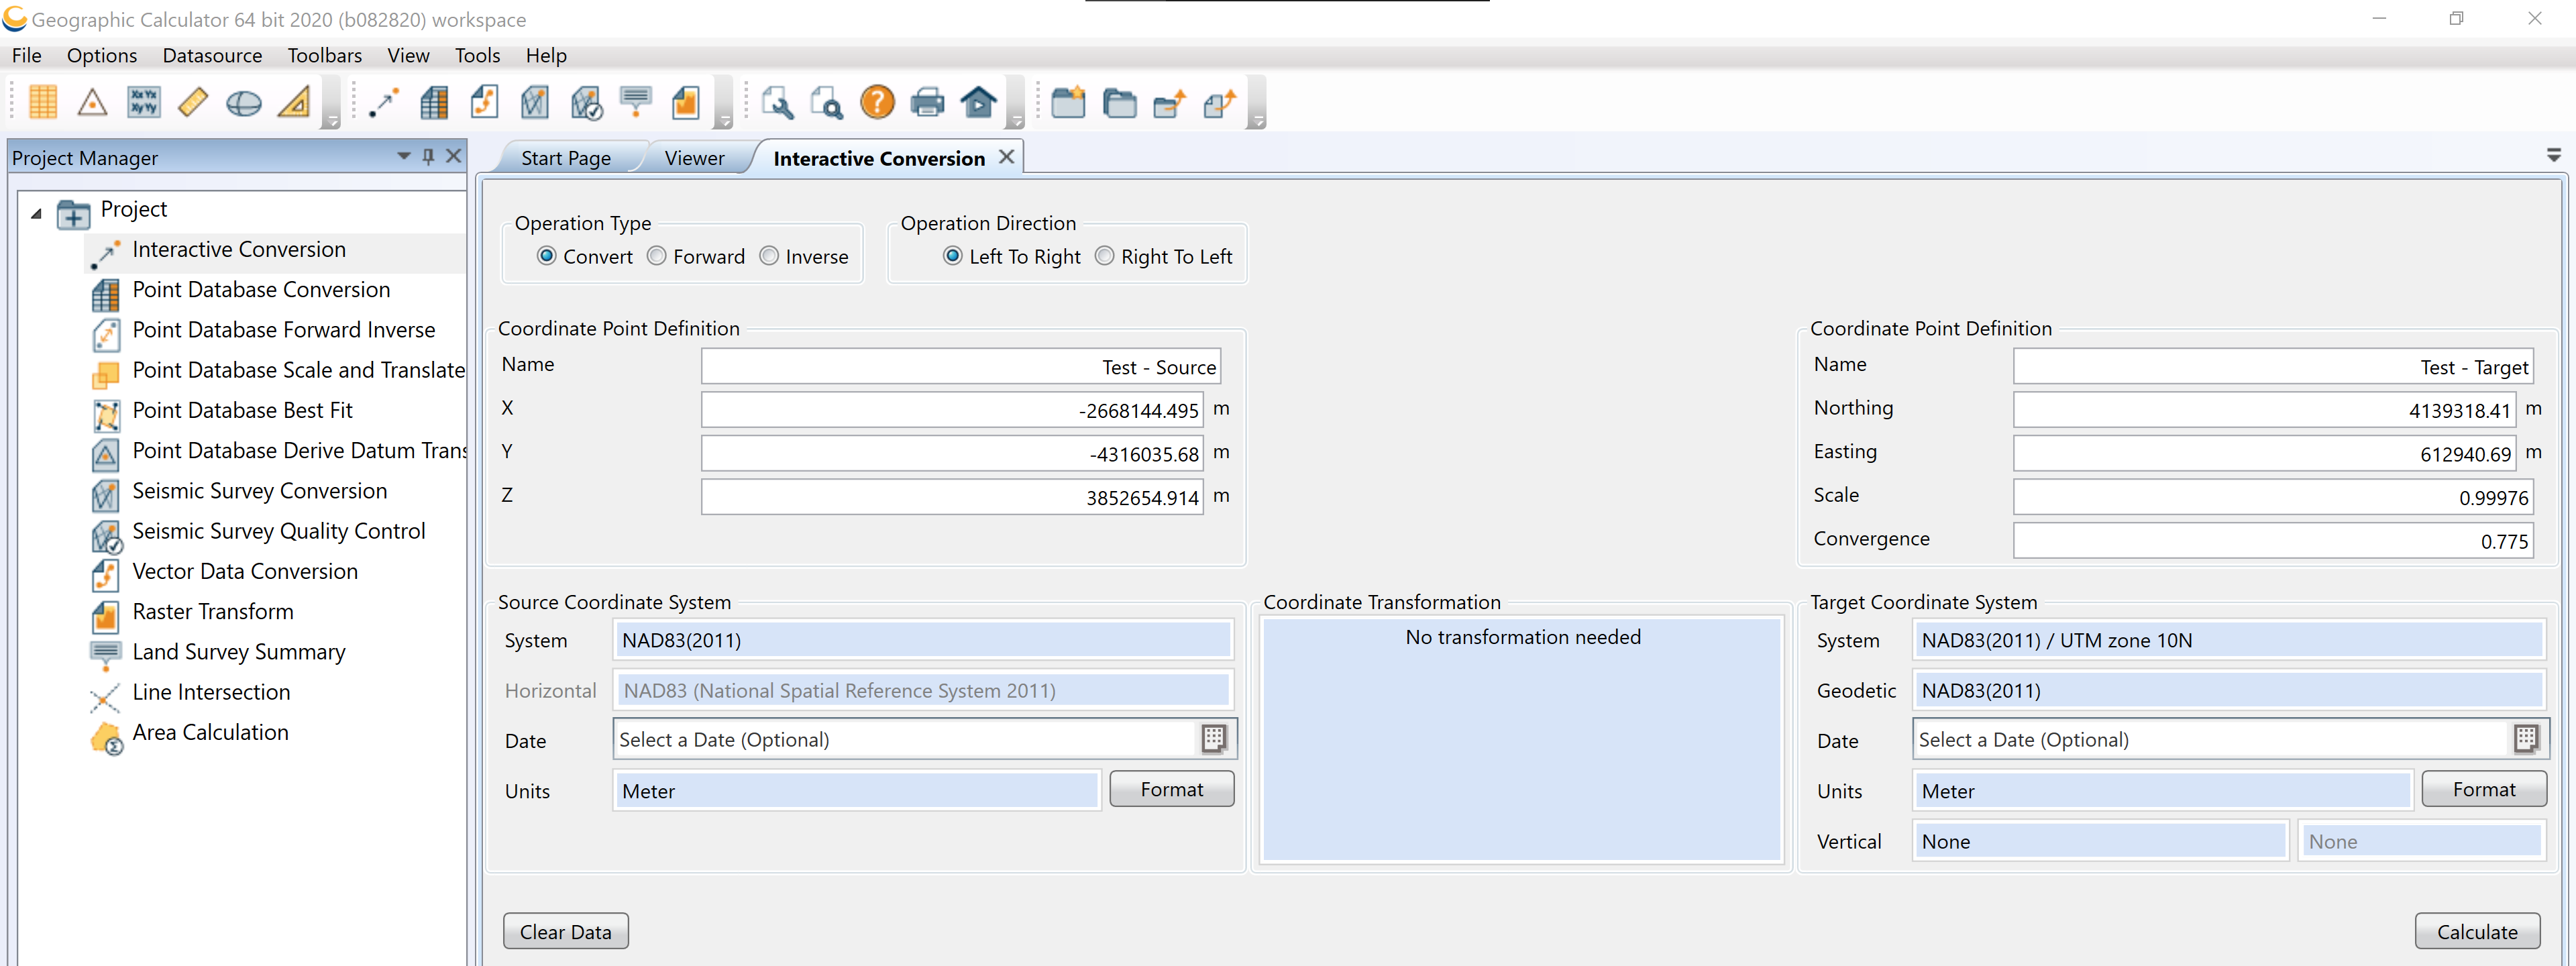
Converting Single Coordinates
- Open Geographic Calculator, check out a license if necessary.
- Click on “Interactive Conversion” in the Project Manager pane on the left. (see below)
- Double click on the "System" entry under Source Coordinate System and select the original coordinate system in the new window.
- In the Target Coordinate System area (right), do the same and select the desired output coordinate system. These actions will update the top of the window, where you will enter in the coordinate you wish to convert.
- At the top left of the conversion window, enter the coordinates of the point you wish to convert, and push the Calculate button to convert.
Note: You may need to provide a Coordinate Transformation depending on the type of conversion you are performing. To do so, double click in the large blue box and select the correct transformation from the window that pops up.
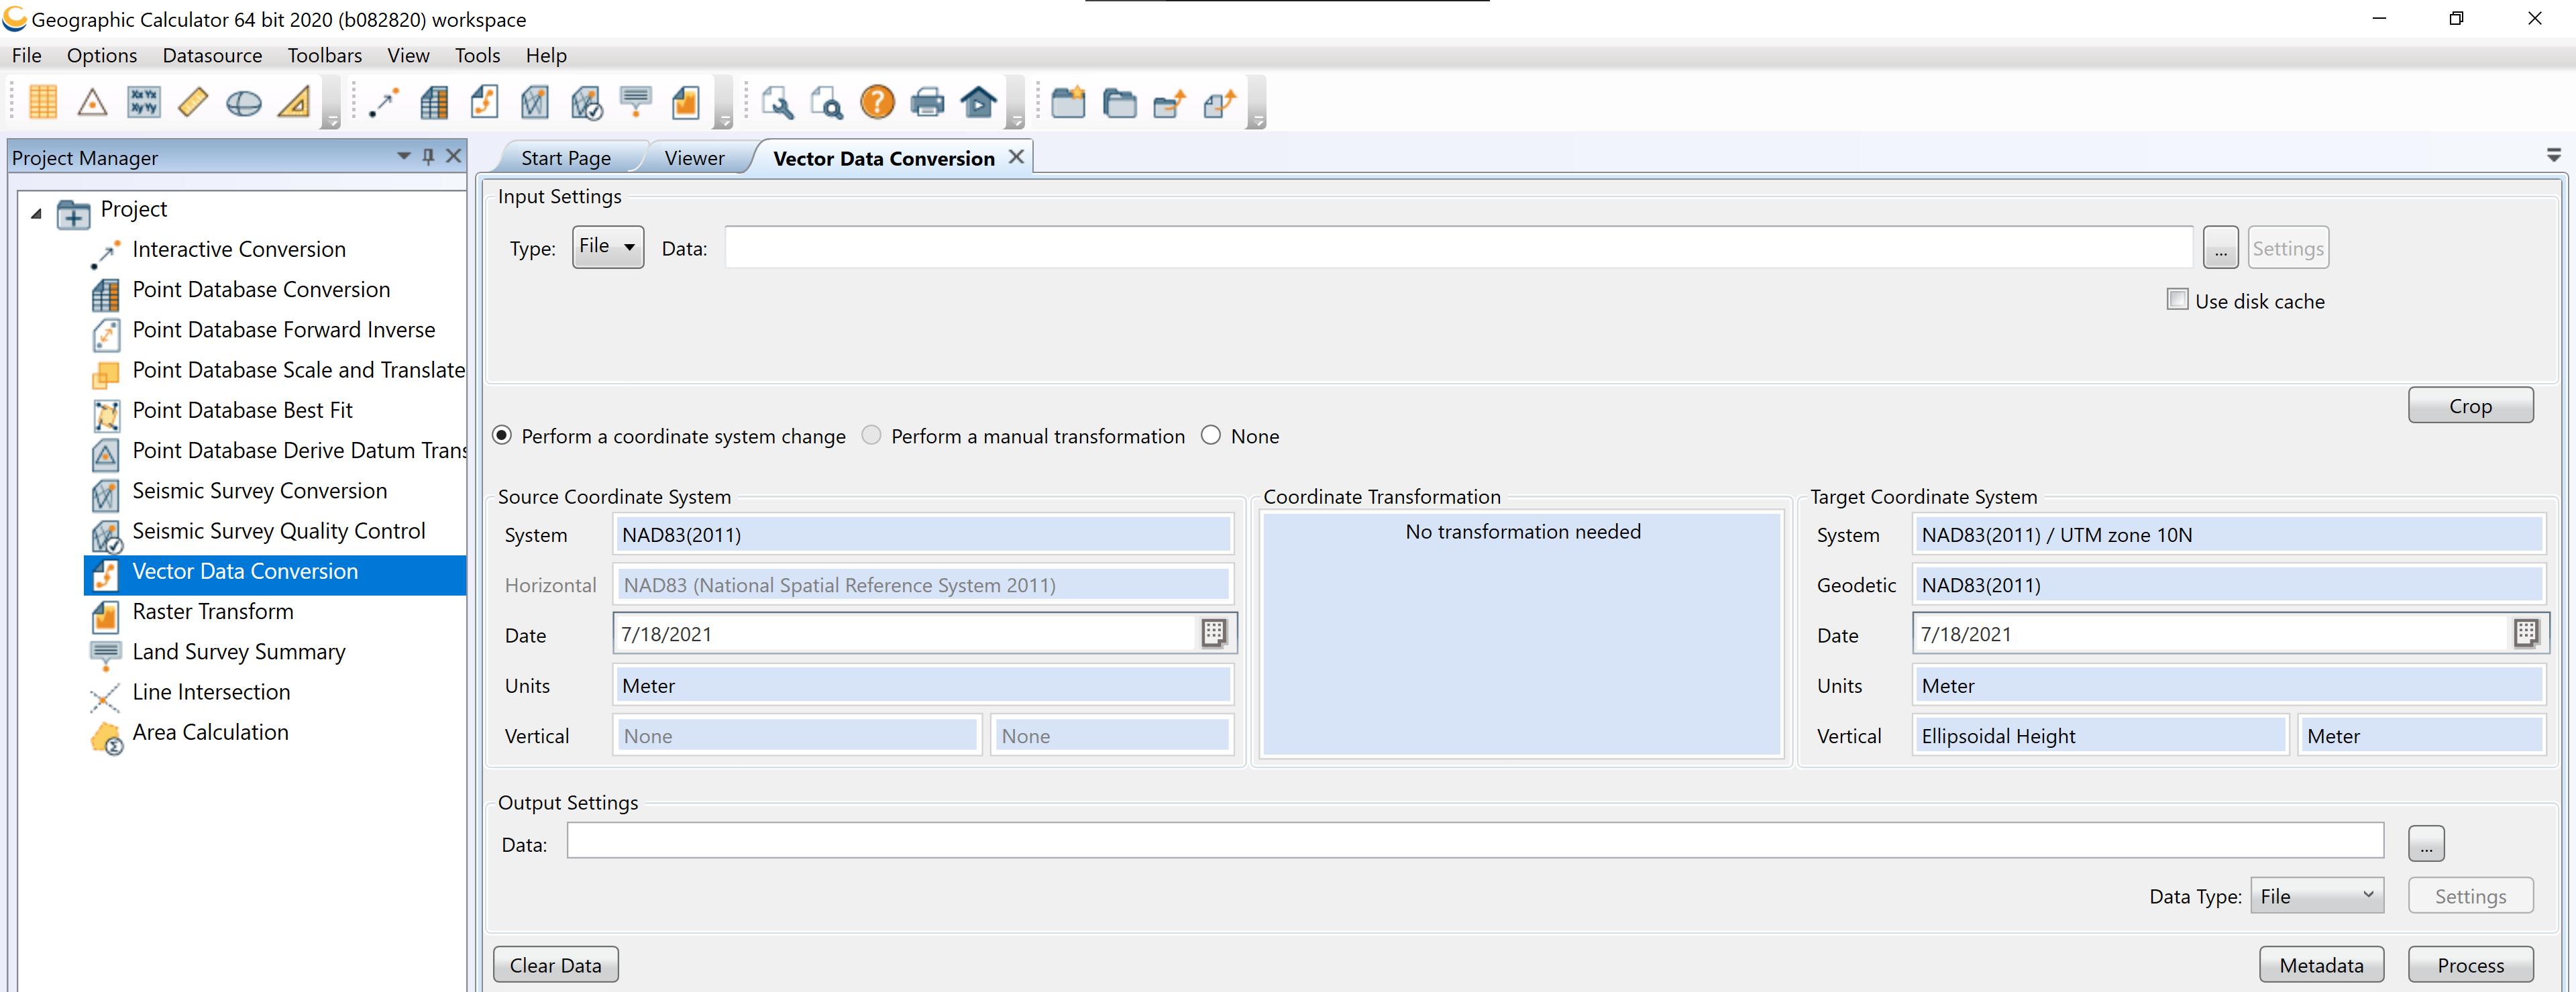
Converting Single Data File
Open Geographic Calculator, check out a license if necessary.
- Click on “Vector Data Conversion” in the Project menu on the left. (see below)
- Double click "System" boxes in the Source Coordinate System and Target Coordinate System columns to select as desired. If prompted, do not limit available coordinate systems by geographic area.
- Option: Set the dates for when the survey was carried out.
- Check to see if the units make sense.
- Set vertical datum if applicable.
- If you have multiple files to process, see "Batch Add Multiple Files" instructions below. Otherwise, continue on here.
- Use the […] button to select your file. (e.g. .las)
- Set your output filename and location.
Note: You may need to provide a Coordinate Transformation depending on the type of conversion you are performing. To do so, double click in the large blue box and select the correct transformation from the window that pops up.
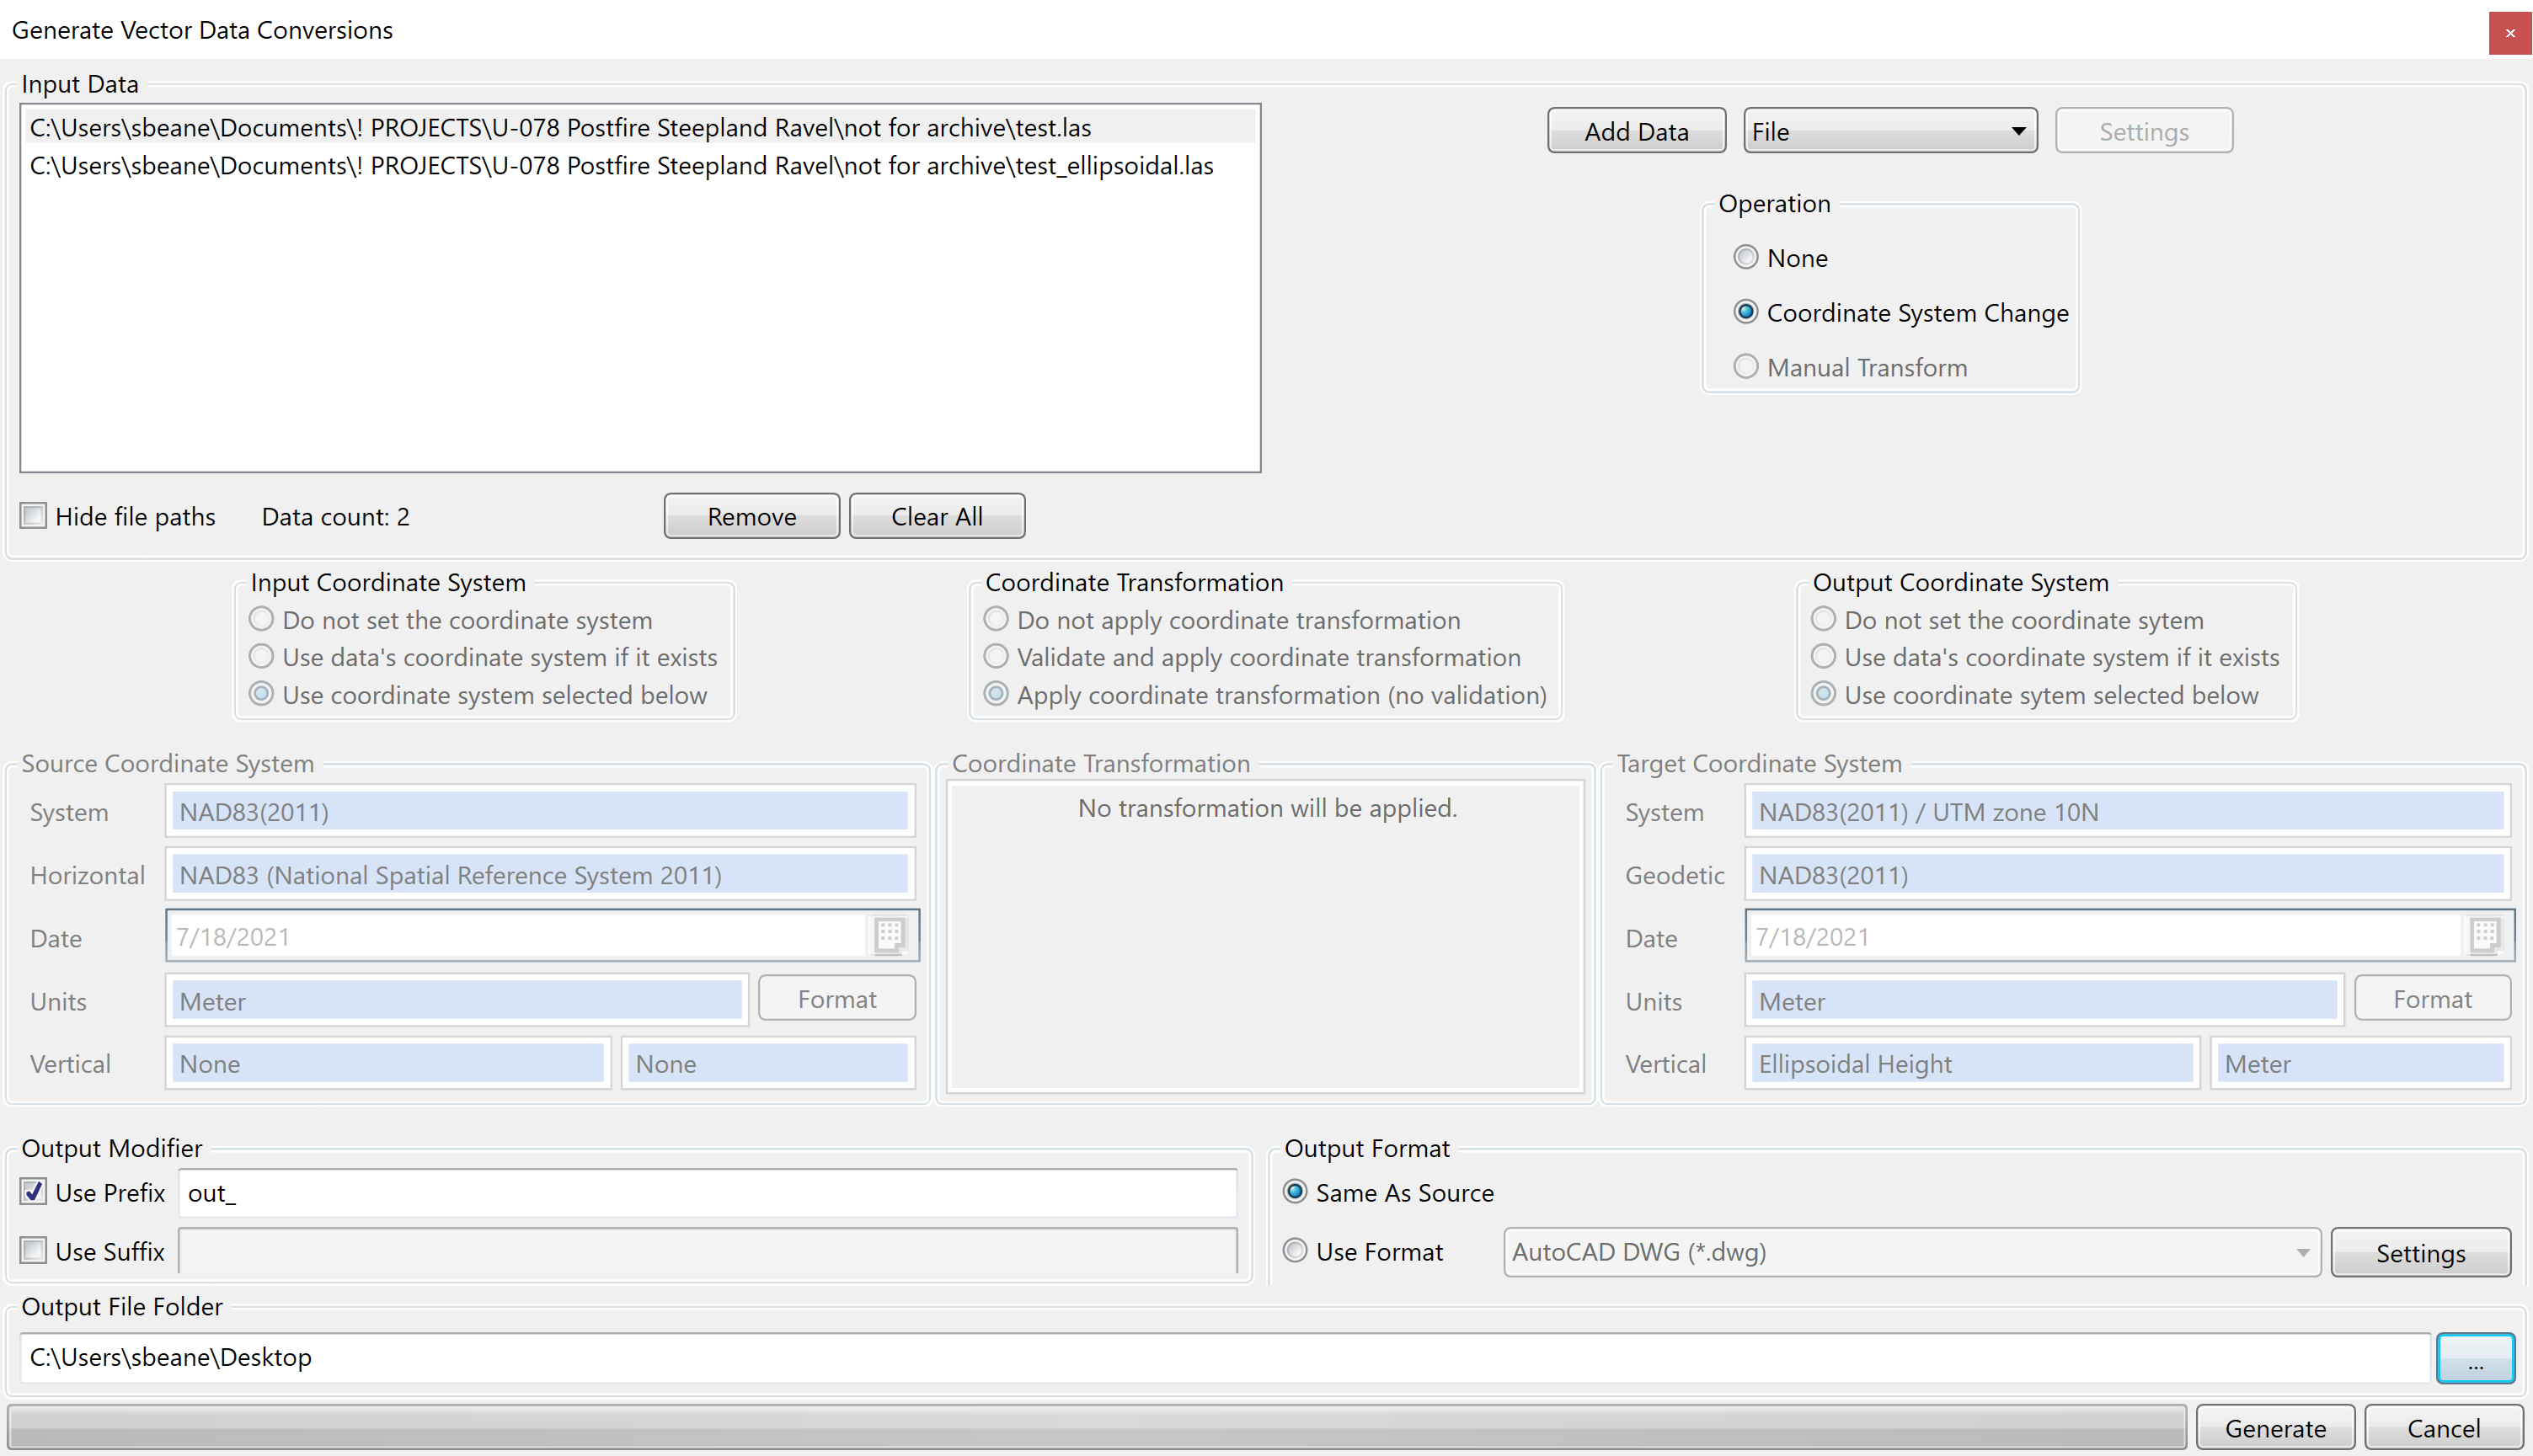
Batch Add Multiple Files
- Follow steps 1-6 in "Converting Single Data File" above.
- Right click "Vector Data Conversion" in the Project Manager pane at left, and select "Batch Add...".
- Use the "Add Data" button to select your files. (see below)
- Check that the transformation settings shown are correct.
- Enter output prefix or suffix if desired.
- Specify the output folder.
- Click "Generate".
Article ID: 819
Created: September 4, 2015
Last Updated: January 24, 2022
Author: Marianne Okal
Online URL: https://kb.unavco.org/article/coordinate-transformations-with-geographic-calculator-819.html